
Cubie: A Rubik’s Cube solving robot
Overview
Cubie is a Rubik’s Cube solving robot that my friend and I designed, built, and programmed from scratch over the span of 9 months. As students who practiced cubing for over the three years prior and could solve it in under 15 seconds, we wanted to build a robot that could solve the cube not just faster than us, but faster than any human out there. We also aimed to keep the budget within $100, and we challenged ourselves to custom-design and code the robot. You can check out the code here and the CADs here and here!
At its core, there are only 12 different moves you can perform on a Rubik’s Cube. This is because each center piece is held in place, and thus each side can only turn around its corresponding center piece, either clockwise (CW) or counterclockwise (CCW). Thus, to optimie our solve time, we had two different goals in mind, a hardware goal and a software goal.
- Hardware goal: To maximize the number of Turns Per Second (TPS) that the robot could perform, where each turn is either a CW or CCW rotation of a face.
- Software goal: To minimize the total number of turns required to solve the cube.
Hardware
CAD
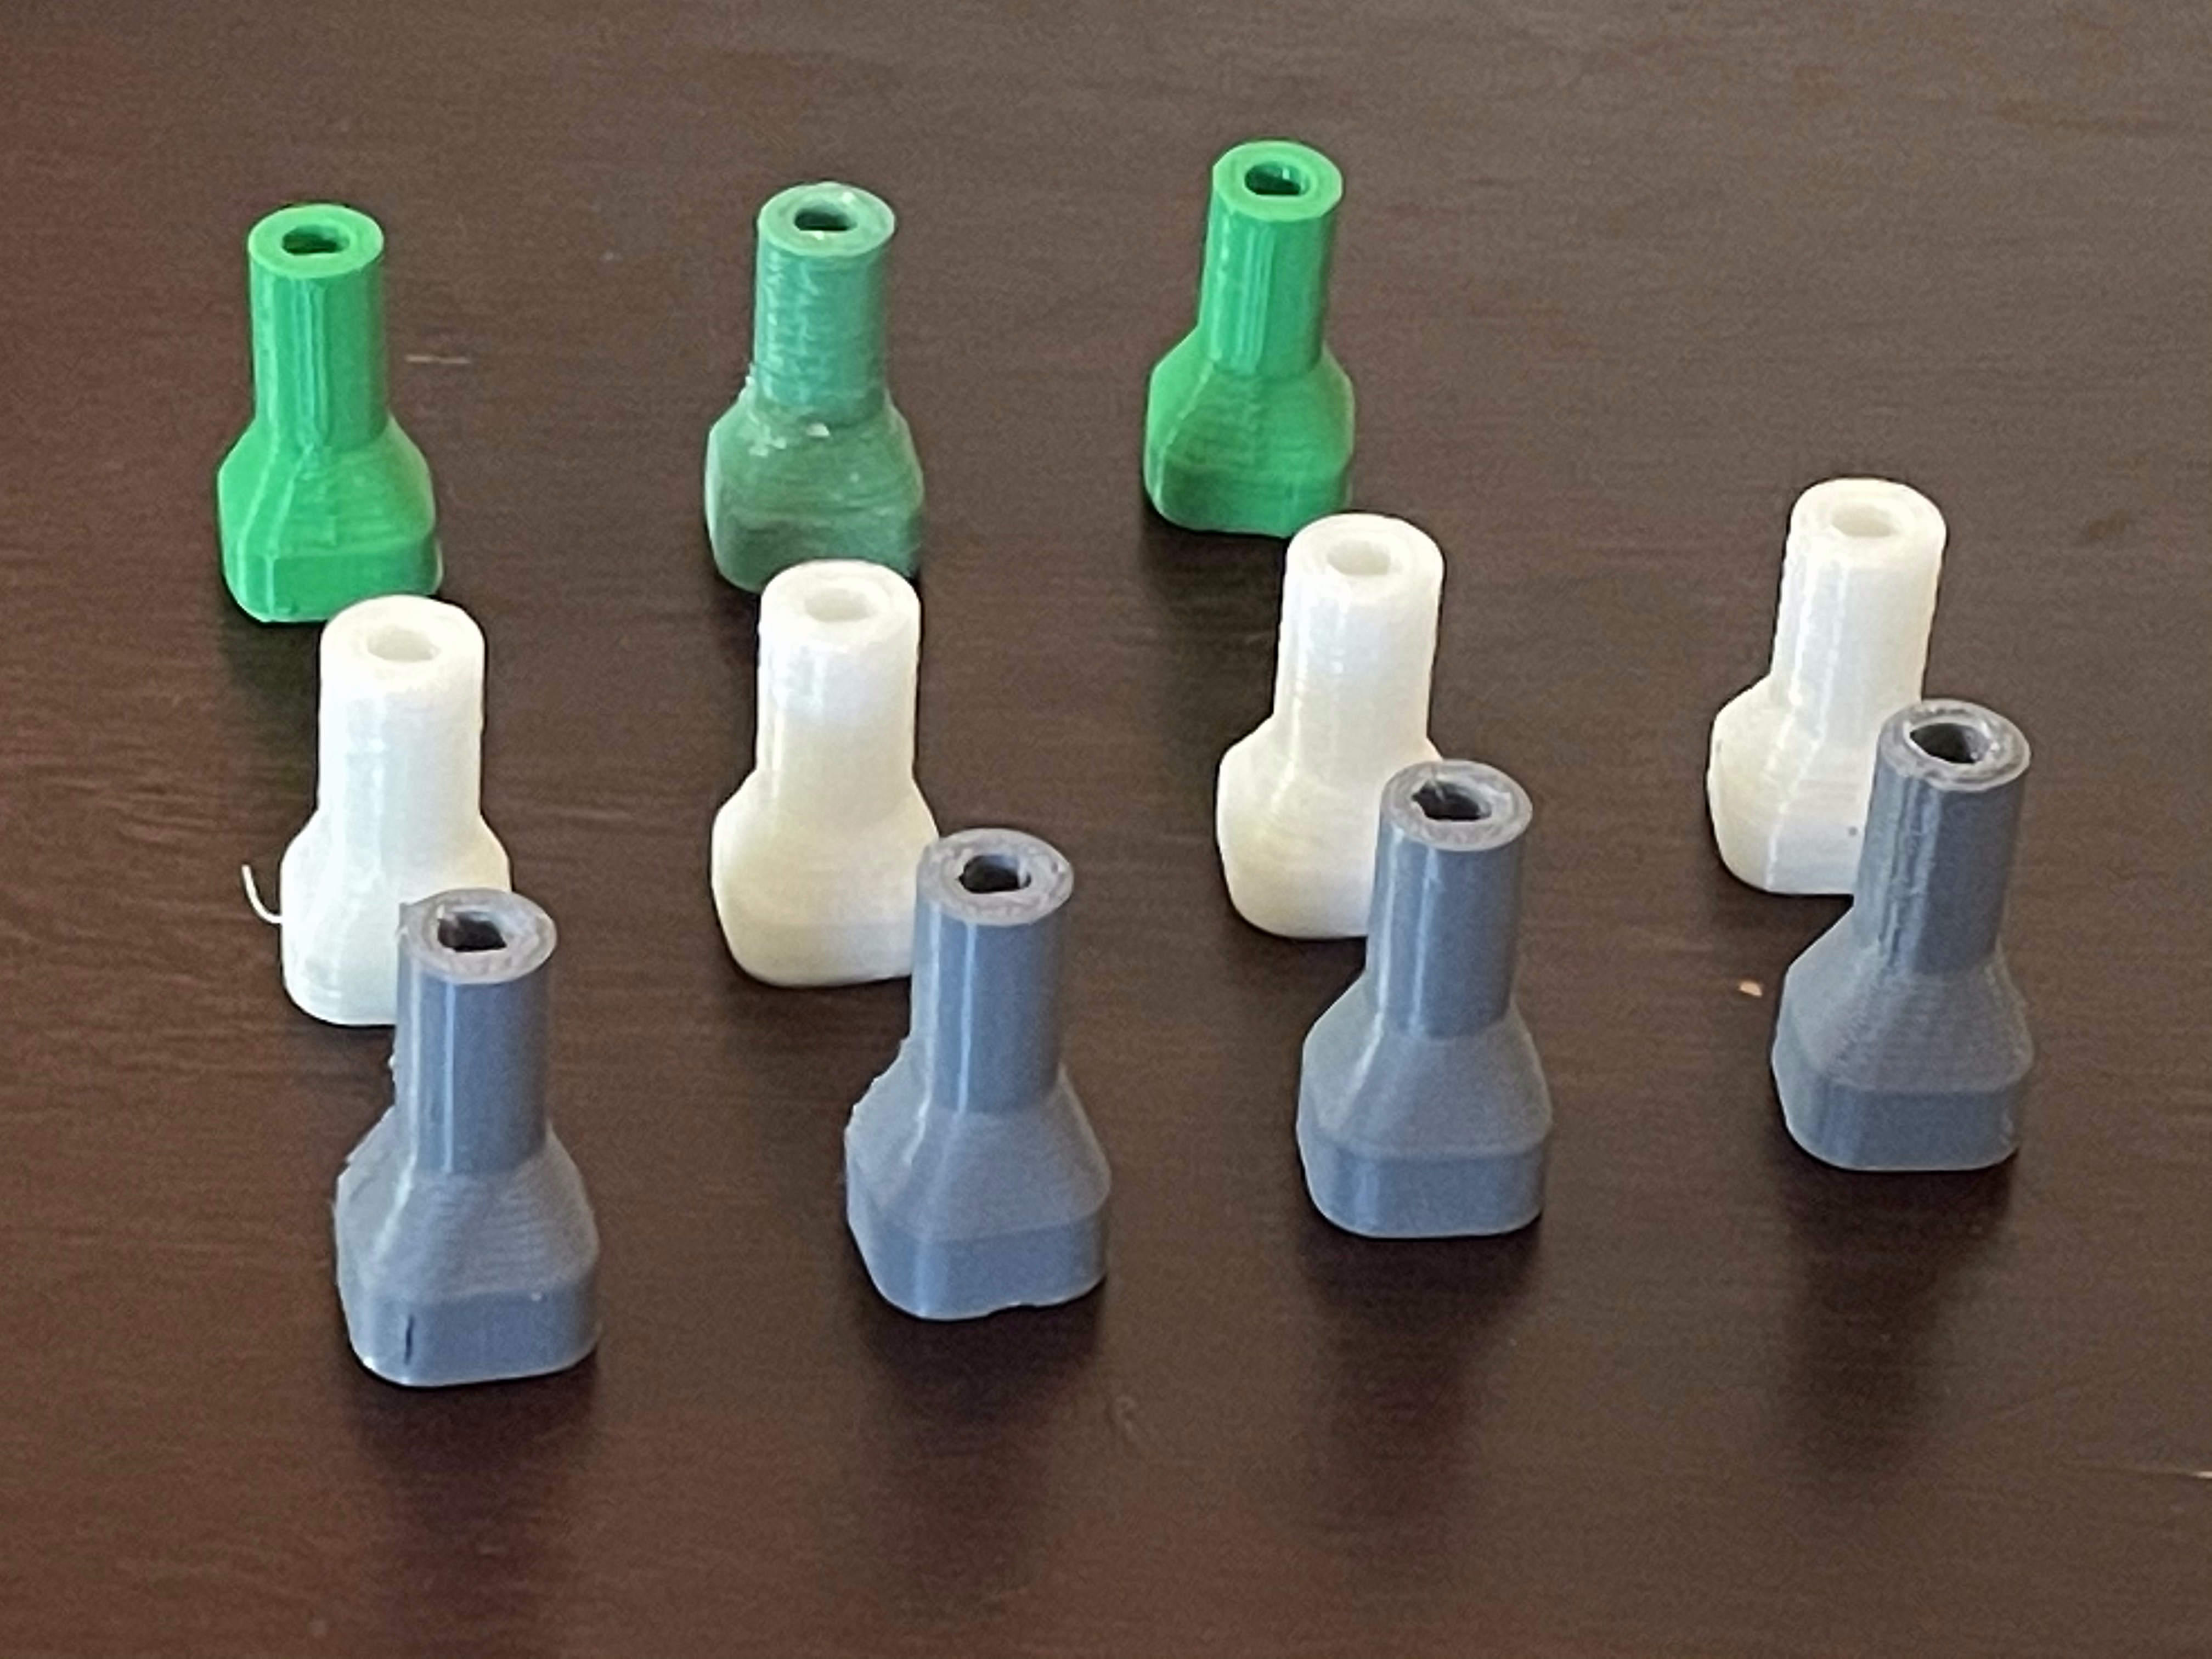
In order to maximize our robot’s TPS, the motors turning the robot needed to have instant access to each face of the cube. We decided to use six different stepper motors, one for each face of the robot. To support this, we needed to CAD and 3D print two different aspects of the robot: the infrastructure to house the motors / cube and adapters that connect the stepper motor’s shaft to the cube’s center piece.
To generate the CAD for our robot, we used OnShape, which allows for easy iteration and version control, and also allows easy contribution by multiple people. Using OnShape, we generated the following CADs for the housing infrastructure and motor adapters.
For the adapters to fit snugly onto the motors and into the cubes, the adapter widths had to be slightly larger and smaller than the motor shaft width and cube center piece width, respectively. Too small and it wouldn’t fit, and too large and it would be too loose. Looseness in the adapters made it so that a 90-degree rotation via the stepper motor wouldn’t turn the cube’s face a full 90 degrees, resulting in jams. Thus, the adapters required many iterations to perfect into a just-right size.
Electronics
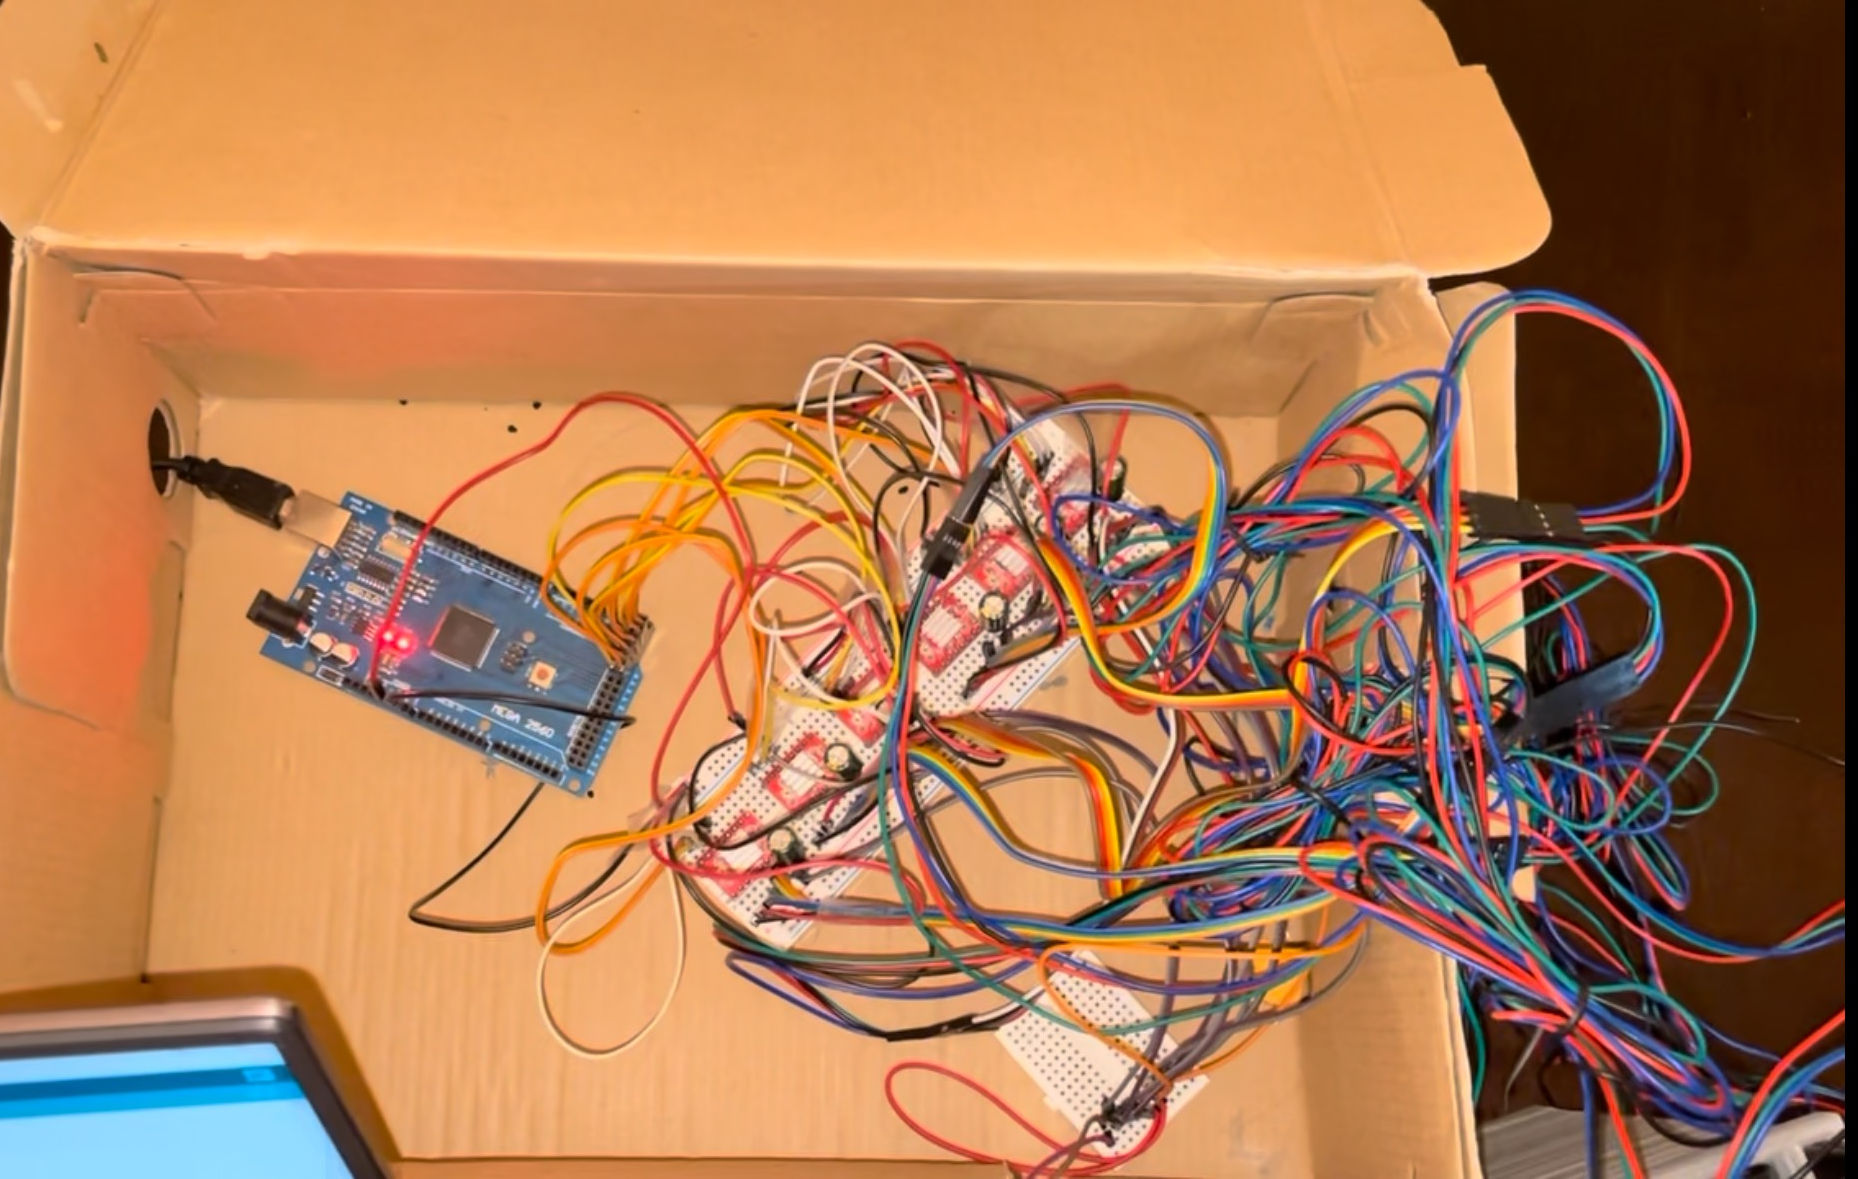
For the electronics, we used 6 stepper motors and 6 corresponding motor drivers that were paired with an Arduino Mega to control the motors. For power, two 3-cell Lipo Batteries were used in serial to generate 24V to the motors. While actual wire harnesses would’ve been cleaner, I opted for the lazier method of just throwing everything into a shoebox!
Software
Algorithm Development
In an effort to only use resources that I knew before attempting this challenge, we chose to implement the CFOP algorithm for our robot. The CFOP, or Cross-F2L-OLL-PLL, algorithm is a way of solving the Rubik’s Cube one layer at a time, and is the method that most speedcubers (including me) prefer. Additionally, there are many optimizations on this algorithm, such as ZBLL, which combine the OLL and PLL parts of this algorithm. These optimizations are difficult to use in practice since they require memorizing hundreds of algorithms. However, computer programs don’t have the memory limitations that humans do.
Before implementing the CFOP algorithm, I decided to construct an interface that would allow me to easily visualize and debug my code. I created this 3D user interface in JavaScript using p5js. Since the core of my algorithm would be in Python, I used a Flask backend to handle communication between the JavaScript webapp.
For the actual algorithm, I coded each step separately. The OLL and PLL sections were quite simple since it simply required using a lookup to determine which case we were in and applying that corresponding algorithm. JPerm’s algorithm list containing all of the OLL and PLL algorithms in order made the accumulation of these algorithms simple. Similarly, while the Cross and F2L sections are often solved intuitively, I went through each scenario that you could encounter and came up with a simple case-by-case algorithm to solve them. Additionally, to minimize turns, I coded some optimizations after generating the solution to remove or shorten any unnecessary turns.
Robot Interface
For the robot to utilize the algorithm, an input interface was needed for the code to know what the cube’s initial state is. To capture the initial state, I initially tried placing cameras around the 3D printed housing. However, to capture every piece of the cube required four cameras. Using expensive cameras would defeat the purpose of cost-effectiveness, and cheaper cameras were unable to do the job due to constant changes in lighting and positioning. Instead, I decided to manually enter the cube’s initial state into the software. To make this process easy-to-use, I created a Tkinter GUI where cube colors for each corresponding face could be easily entered.
Final Robot
In addition to my own CFOP algorithmic implementation, I also experimented with other algorithms such as Kociemba’s algorithm, which is near-optimal. The final version of Cubie was able to solve the cube in under 4 seconds!